Chicken Coop Phase 3
- Feb 3
- 6 min read
We have completed Phase 1 and Phase 2... Now we are ready to add the siding, install windows, attach rafters and put on the roof panels. And make the door!
MATERIALS AND SUPPLIES
(6) 4x8ft siding panels like THESE
2 inch constriction screws
4 1/2 inch construction screws
(6) 54 inch metal roof panels
8 ft ridge cap
metal to wood screws
(3) 4x8 ft 3/4 inch plywood
(7) 2x4x8ft for door frames
(13) 5 inch cedar fence pickets
(6) 3 inch cedar fence pickets
4 hinges
door latch
slide bolt to connect doors if you do Dutch style
Circular or miter saw
jigsaw or saws-all
tape measure
level
drill
ladder
helper
A quick note about roofing materials: We got our metal roof panels custom made at a local metal fabricator in Grayson County TX, along with the ridge cap and installation screws. You'll want to find someone near you to get these panels made, these items only cost a couple hundred dollars. We chose to use black painted panels and ridge cap. If you don't want to use metal, you can shingle instead. You'd still install the decking over the rafters, and then use roof paper then shingles.
Installing your siding correctly will square up any twist or lean you have in your framing. The sides of the coop are exactly 8 ft long, and your windows are installed at 4 ft high, so the sides are a great starting point for siding. You'll need an extra set of hands for this part.
Check your building frame for lean using a level. See which direction you need to push on the wall to get it level both up and down, and sideways. Put one sheet of siding in place along an 8 foot wall, and attach one side using 2 inch construction screws. Now push your frame into square and attach the other side, and at various attachment points along the frame studs. Do the same with the other side of the coop.
Now that both long sides are covered your building is close to square. Cut a panel to fit the back wall, 79x48 measured, but be sure to cut to fit as your measurements can be off slightly due to shrink or cut. Adjust and push wall to level and attach this panel like the other two. Now you'll measure and cut the panels for the front wall on either side of the door. Your building should feel solid and walls now have no give when pushed.
To cut the triangle pieces of siding for the front and back, I had a helper hold it up in place and I traced the cut lines with a marker. There will be a little triangle gap at the top where the height of the roof peak exceeds the siding. You can also cut a small piece to fit here or cover it with trim later. Do this for the front and back triangles, and install.
Once your siding is complete, cut the window holes by drilling a hole in the siding and using a jig saw or saws all to cut the opening. Screw windows into the studs and the bottom block its sitting on. I installed the wondows this way so the flange on the windows would not keep siding from sitting flush on studs, and makes it easy to replace them if they break. I later coveres the explosed flange with trim.

Now you're ready to install your rafter pairs. Use your long 4.5
inch construction screws. First, we installed the front and back most rafter directly to the top plates of the front and back wall. The we stretched a string between them to keep our peaks in line. Install each rafter pair over the studs.

We not only screwed down from the rafter into the top plate, we also screwed from underneath, slightly angled up from the plate into the ratfer.

Once all your rafters are installed, use your plywood to deck the roof. Have someone inside the coop adjusting each rafter pair to ensure vertical level as tou screw the decking into place. Because the decking panels are 4x8 and your roof is 54 inches by 8ft, youll need to cut a couple strips from the third piece of plywood to get total coverage. The extra plywood is great for making nest boxes!
Once your decking is on, attach the roof panels with the metal to wood screws that came with your panels. In hindsight, I should have left a small gap at the top and let my metal panels hang over the decking by an inch or two. This would better protect the decking from rain, and the ridge cap would cover the gap anyway. Ah well. Attach the ridge cap in place and the roof is done!

Now you're dried in and ready to make the doors!
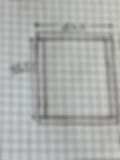
Start by measuring your opening. You should have 72 inch in height, and 38 inches wide if you put your front wall studs at 16 on center, but that can vary if your stud placement was a little off. But for instruction purposes, we will go off of a 72x38 opening.

I chose to make a dutch door so I could check on the chickens without letting them all out. Plus, its pretty. I split my door into a 42.5 x 37.5 inch and a 29 x 37.5 inch section so my door was just a little smaller than the opening to allow for movement clearance.

To make the dutch doors, Start by cutting four lengths of 37.5 inches (or whatever your side to side measurement is, minus about a half inch. For the bottom door, Cut your height minus 7 inches (the width of the two horizontal pieces) so that you can make a rectangle that's 42.5 x 37.5. Follow the same method to measure and cut your top door verticals.
Once you lay out your rectangle frames, measure corner to corner to check for square and attach your metal corner brackets to hold the frame in place.

Cut your fence pickets to the width of your rectangles (37.5 inches). Save the scraps becasue you may want to use them for trim out. Now flip each rectangle over and install the cedar fence pickets using your 2 incg screws. You don't want to install on the side with the brackets because the pickets won't lay flush. You will probably have to cut one lengthwise to get the right amount of coverage.

Add whatever trim pattern you like! You could do diagonals, cross pieces, outlines, etc. Just keep in mind where your hinges will attach so you keep that area flat and flush. Add hinges and attach, and install door latch and slide bolt.

The last thing i did was cut a little hatch door in the back wall so my chickens could walk out and easily get to the fenced in area behind the coop. This hatch is just a square I cut from the siding, attached hinges to the side so it swings sideways to stay open, and a fence latch to keep it closed at night when I lock them up!

At this point I painted the siding, and added cedar trim to the edges to cover all my not so pretty joints and gaps.

This wasn't an easy project or a fast one. But, its sturdy, warm, dry, and my chickens love it!
Feel free to reach out of you need clarifiaction or need me to elaborate on anything posted here.
Happy building!